Coping stones play a crucial role in protecting walls from water damage while also providing a clean, finished appearance. Whether used on garden walls, parapets or roof edges, properly installed coping stones can significantly extend the lifespan of a structure.
However, mistakes during installation are common, and can often lead to costly repairs down the line.
Many installation issues can be avoided by selecting the right coping stones from the start. Our guide to choosing coping stones explains what to consider before you buy.

At Roof Giant, we know first-hand how small errors can turn into major issues. Here are the most common mistakes to avoid when installing coping stones.
One of the most common mistakes is using an unsuitable mortar mix. A mix that is too weak may not provide enough bond, while a mix that is too strong can increase the risk of cracking.
Always use a mortar mix suitable for the coping stone material, wall type and site conditions. As a general guide, many installations use a 3:1 or 4:1 sharp sand-to-cement mix, but manufacturer guidance should always be followed.
Installing coping stones in heavy rain, frost or extreme heat can compromise the mortar bond and final finish.
Aim to work in mild, dry conditions. Avoid installation during freezing temperatures, heavy rainfall or intense direct sunlight as these can affect curing and long-term performance.
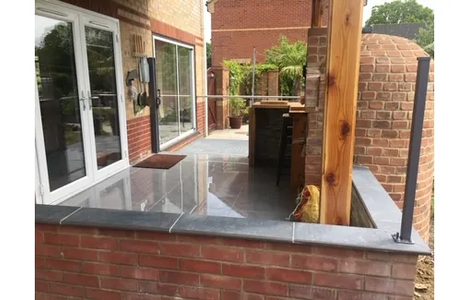
Coping stones are designed to direct rainwater away from the wall below. Consider how much of an overhang they should have so water doesn't run down the face of the wall, causing staining, damp and gradual deterioration.
As a general rule, allow a consistent overhang on both sides of the wall, typically around 40-50mm, unless the product or project specification states otherwise.
A drip groove, also known as throating, helps stop water from tracking back underneath the coping stone and onto the wall face.
Before installation, check that the coping stones have suitable drip grooves and that they are positioned correctly once installed.
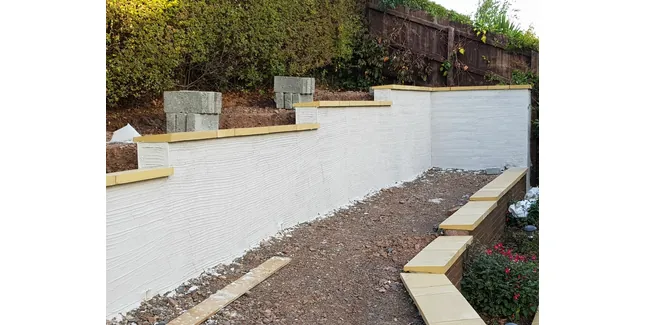
An uneven mortar bed can cause coping stones to rock or sit unevenly, which not only looks unprofessional but also weakens the installation.
Apply a full, even bed of mortar and use a spirit level to ensure each stone is properly aligned, helping maintain consistent falls and straight lines across longer runs.
Coping stones and the structure beneath them will expand and contract as temperatures change. Without suitable movement joints, longer runs can be more prone to cracking, lifting or displacement.
Include expansion joints at appropriate intervals, particularly on long wall runs, parapets and exposed areas. Always follow the coping stone manufacturer’s recommendations and any project specification.
Poorly finished joints can allow water to penetrate between coping stones, increasing the risk of staining, frost damage and mortar failure.
Keep joint widths consistent, fully fill each joint and tool the mortar neatly for a sealed, professional finish. Remove excess mortar as you go to avoid staining the surface of the coping stones.
Coping stones that are not fully bedded or properly secured can move over time, especially in exposed or high-wind locations. Movement can open joints, allow water ingress and affect the overall appearance of the installation.
Each stone should be carefully aligned, firmly bedded and checked for stability before moving on to the next. Do not rely on spot bedding, as this can leave voids beneath the stone. Our guide on how to secure coping stones can help you through the process.
Choosing the wrong coping stone can reduce the performance and lifespan of the wall or roof edge. A coping stone that is too narrow, poorly weathered or unsuitable for the project may fail to shed water effectively.
Consider the wall width, exposure, finish and drainage requirements before choosing. Once weathered coping stones are designed to shed water in one direction, while twice weathered coping stones shed water in both directions.
Porcelain, concrete and granite options may also suit different aesthetic and performance requirements for your project.
Even well-installed coping stones should be inspected periodically. Over time, weather exposure can weaken joints, loosen stones or cause small cracks to develop.
Check for cracked mortar, loose stones, damaged sealants and signs of water staining. Addressing small issues early can help prevent larger repairs later.
Before and during installation, check that:
Installing coping stones may seem straightforward, but attention to detail is essential. The right mortar, correct overhang, proper joint finishing, as well as the correct type of coping stones all play a part in creating a long-lasting, weather-resistant finish.
For high-quality coping stones, roofing materials and installation accessories, explore our full range at Roof Giant.
For more advice on choosing the right option for your project, see our coping stones guide.