Roof Giant's Guide To Replacing Your Shed Roof Felt

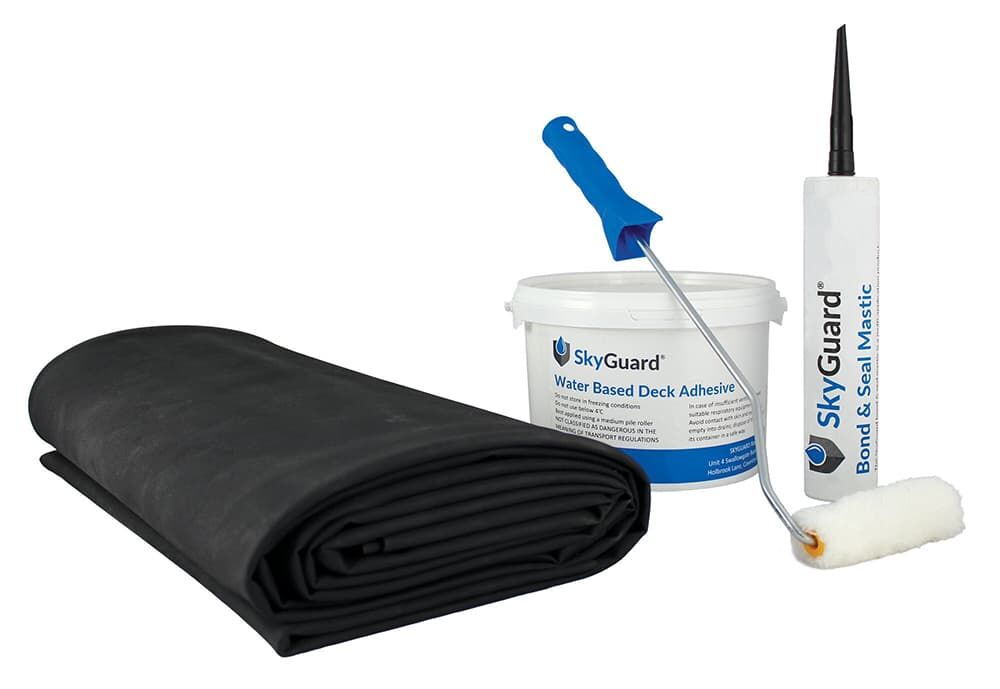
When repairing or replacing your shed roof felt you want to make sure that it will stand the test of time. If you choose a thin, poor quality felt then it may succumb to the elements, especially given the unpredictable weather in the UK. Here at Roof Giant, we sell only the best quality shed roofing materials that are not only built to last but will also blend seamlessly with the natural surroundings of your garden.

EPDM shed roofs are an ideal alternative to old roofing felt and sheets as most professional-grade membranes can last around 20 - 30 years with some lasting over 50 years with proper installation. They are also designed to be weather resistant and UV stable, which ensures their longevity and makes them a more environmentally friendly option. This guide will take you through the key stages of removing your old, damaged and worn roofing felt and how to replace it with an EPDM rubber roof membrane such as SKYGUARD EPDM or Firestone Rubbaseal.

SKYGUARD EPDM Shed Roof Kit

Installation Guide

  1. Remove any bargeboards, roof trims and decorative finials. These items are usually delicate so care should be taken if you wish to reapply them to your roof. You may wish to use a multi-tool or a flat pry bar to remove these items.
  2. Your next step is to remove any old felt from the roof. First, you need to ascertain whether your existing shed roof is the classic nail only version or whether it has been glued down or hot bonded. If your shed is nail only then it is relatively easy to remove. Simply use a flat pry bar or claw hammer to remove the clout nails and the old felt should peel off smoothly without damaging the existing shed timber.
  3. If your shed roof is glued or heat bonded you can use a digging spade/border spade with a flat edge to stip your old felt roof. Use the blade of the spade to get in between the wood and felt and use a repetitive striking action at roughly a 30° angle to remove the shed felt. We would recommend doing this on a cooler, cloudy day.
  4. Now you can move onto fitting your new roofing material. Unroll the EPDM membrane and allow roughly 30 minutes for it to relax. Simply unpack and position over the roof deck allowing it to hang over the roof on all sides. Make sure that there is a material overhang at the front and back of the shed for behind the bargeboards and allow for a drip overlap at the eaves of the shed roof. This will ensure that any rainwater will keep clear of the timber and fall into the guttering.
  5. You will now have to apply the water-based adhesive that comes with the SKYGUARD EPDM Shed Roof Kit and Firestone Rubbaseal Rubber Roof Shed Kit. Expose half of the roof deck by rolling or folding back the EPDM membrane and then secure using gaffa tape if needed. Apply the water-based adhesive with an old paint roller in stages from the ridge to the bottom edges. The adhesive must be wet when the rubber membrane is folded back into position. Remove any air bubbles using a soft brush.
  6. Finally, apply a thin bead of silicone sealant to the perimeter and press the membrane onto it. Secure the edges of the EPDM membrane using either galvanised clout nails, a treated timber batten or a shed roof edge trim. The trim will ensure that the roofing membrane is secure and free from wind uplift. You can then proceed to cut off any excess rubber material from the roof by simply cutting it with some roofing scissors or a roofers knife.

Safety Tips

  • Working from low-level heights can still lead to a risk of injury so be careful not to become complacent and be sure to work safely.
  • Ensure that your roof is sound enough to lean on or bear some of your weight - you can check the inside of your shed to examine its construction and whether or not the timber is rotten.
  • Check the surface of your stripped roof for any old nails that may be perforate your new roof covering and remove them to avoid any damage to your new roof or yourself.