Roof Giant's Coping Stones FAQ

What are coping stones?

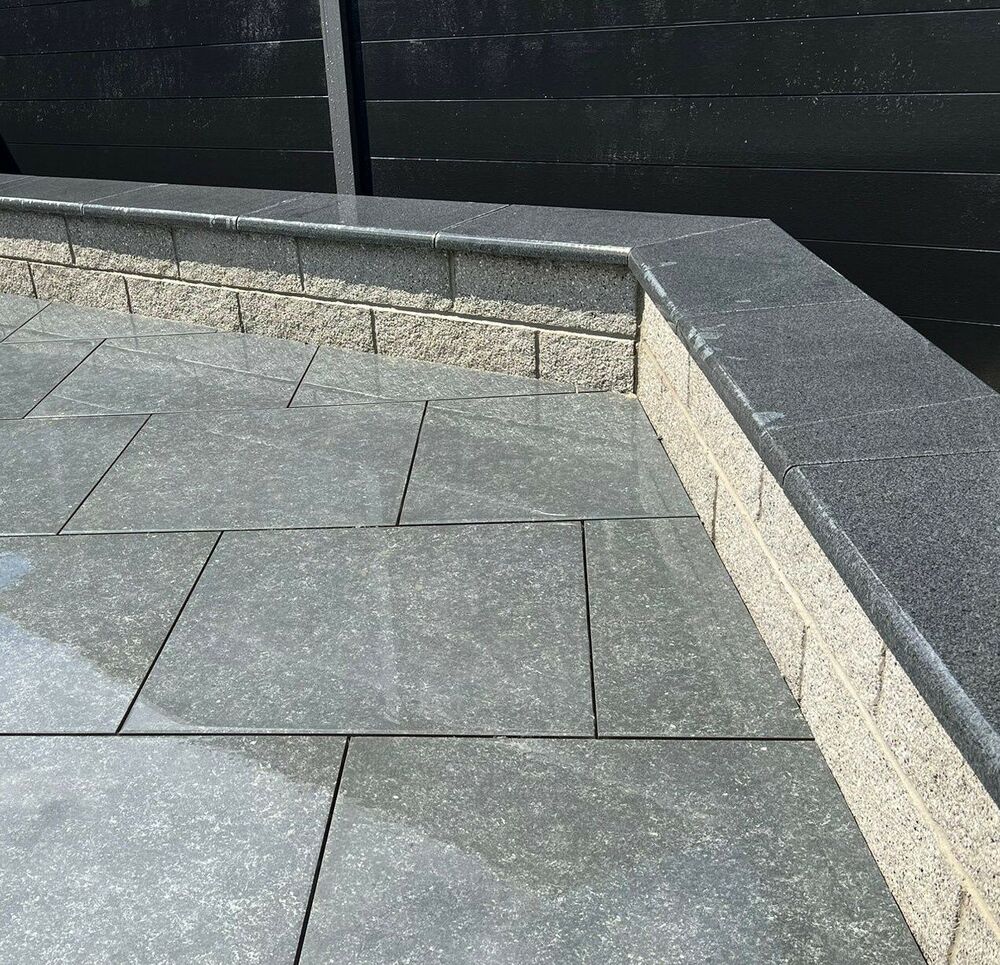
Coping stones are protective caps placed on top of walls, parapets and pillars. Also known as cap stones or wall caps, they help prevent water ingress, protect masonry from weather damage and provide a clean, finished appearance.

They serve multiple purposes, including:

  • Providing protection against weather elements and moisture infiltration.
  • Preventing the erosion of brick or masonry.
  • Enhancing the visual appeal of walls and structures.
  • Offering a finished and polished appearance.

Coping stones are essential in improving the aesthetics and structural integrity of free-standing walls made of brick or stone. They are the uppermost course or primary portion of coping, which is the protective upper layer of such walls. The coping course frequently takes the shape of curved, flat or sloped profiles.

These specialised wall stones are designed to blend in with coping, operating as an integrated component of it. This guide explains everything you need to know about coping stones and how they can improve the quality and appeal of your wall projects.

Coping stone

What are coping stones made from?

When it comes to selecting the correct material for your coping stones, you have several options.

  • Natural stone (Sandstone/Limestone): Rustic and timeless look, breathable, ideal for traditional builds.
  • Granite: Extremely durable, low porosity, best for high-exposure areas.
  • Concrete: Cost-effective, widely available, consistent finish.
  • Cast stone: Designed to replicate natural stone at a lower price.
  • Porcelain: Modern, low maintenance, highly weather resistant.
  • Clay: Best suited for heritage properties.
  • Metal: Typically used for contemporary or commercial designs.

What type of coping stone should I choose?

Roof Giant offers a wide range of coping stone types to suit different wall designs and applications:

  • Flat coping stones: Provide a clean, modern appearance. Often include subtle drip grooves to manage water runoff.
  • Once weathered coping stones: Sloped in one direction to channel water away from a single side - ideal for parapet walls or edges.
  • Twice weathered coping stones: Feature a central ridge with slopes on both sides, allowing water to run off evenly - perfect for freestanding and boundary walls.
  • Return coping stones: Designed for corners and angles, ensuring a neat and continuous finish around wall changes in direction.
  • End pieces: Used to neatly finish the ends of coping runs, improving both appearance and weather protection.
  • Pier caps: Specifically designed for pillars and posts, providing the same protective function as coping stones but for vertical structures.
  • Aluminium coping systems: A modern solution typically used on flat roof parapets, offering lightweight durability and strong resistance to weather exposure.
Coping stone
Type of Coping Stone Main Uses Attributes Suitable Buildings/Structures
Natural Stone Ideal for traditional and rustic settings Timeless elegance, durability Historical buildings, garden walls, residential fences, heritage structures
Concrete Can mimic the look of natural stone. Can be either weather or weathered Versatile and durable Modern buildings, commercial structures, garden walls, swimming pools
Clay Often used in heritage or traditional aesthetics Classic charm Traditional homes, cottages, heritage structures, garden walls
Cast Stone Replicates natural stone appearance Blend of aesthetics and cost-effectiveness Residential buildings, garden walls, pillars, public spaces
Metal Commonly used in contemporary designs Modern and sleek Contemporary architecture, modern homes, commercial spaces, swimming pool areas

How do I install & maintain coping stones?

Proper installation is crucial for the longevity and effectiveness of coping stones:

  • Ensure a level and secure base for the coping stones
  • Use mortar or adhesive designed for outdoor applications
  • Pay attention to overhang and drip edges to divert water from the wall - coping stones should overhang the wall by approximately 30–50mm on each side to allow effective water runoff, preventing staining or saturation of the wall below
  • Regularly inspect for any damage or loose stones and address maintenance promptly
  • Clean periodically to prevent moss/algae buildup
  • Repoint if mortar deteriorates
  • Seal (if applicable to material like natural stone)
  • Check joints annually

If you're unsure about coping stone installation or have a complex project, consider hiring a professional landscaper or mason. They can provide expertise, ensure proper installation, and create a seamless transition between coping stones and existing structures.

Measurement & planning

Step 1: Gather tools

Collect the necessary tools for accurate measurement: a reliable tape measure, an angle measuring tool or protractor, paper, and a pen or pencil.

Step 2: Measure the length

Starting at one end of the wall, extend the tape measure along the entire length of the area where coping stones will be installed. Record this measurement in both metric and imperial units for reference.

Step 3: Address corners & curves

For walls with corners or curves, measure each side separately. Extend the tape measure along each side, making sure it follows the contours accurately. If there are curves, measure the straight sections and any curved portions separately, noting down each measurement.

Step 4: Measure angles

For corners, determine the precise angles using an angle measuring tool or protractor. Place the tool in the corner, aligning its centre with the vertex, and read the angle measurement. Record the angles for each corner, ensuring accuracy.

Step 5: Calculate the number of stones

Based on the measurements you've collected, calculate the number of coping stones needed. Consider both the length of each stone and any corner pieces required. If you're using stones of different lengths, calculate the total length of each section separately and then sum them up. Add a small percentage (around 5-10%) for potential errors, adjustments, or breakages during installation.

Step 6: Re-check

Review your measurements and calculations to ensure accuracy. Double-check your recorded lengths, angles, and calculations before finalising the number of coping stones needed.

Coping stones

Installation

Fitting coping stones is an essential part of maintaining walls, parapets, or other structures, providing protection against weather and adding a polished look. Here's a step-by-step guide on how to fit coping stones:

Tools & materials you'll need:

  • Coping stones
  • Mortar mix - Use a strong mortar mix (typically 3:1 sharp sand to cement) suitable for external use.
  • Adhesive (optional) - Adhesive can be used in addition to mortar but should not replace a full mortar bed for structural stability.
  • Trowel
  • Spirit level
  • Tape measure
  • Safety equipment (gloves, goggles)
  • Jointing compound (optional)
  • Brush

Step 1: Preparation

1.1 Safety First: Put on your safety gear, including gloves and goggles, to protect yourself during the process.

1.2 Assessment: Examine the wall or structure where the coping stones will be installed. Ensure it's clean, stable, and the mortar joints are in good condition. Repair any damaged sections.

1.3 Measurement: Measure the length of the wall to determine how many coping stones you'll need. Consider any corner pieces if the wall isn't straight.

Step 2: Mortar preparation

2.1 Mix Mortar: Prepare the mortar mix according to the manufacturer's instructions. It should have a consistency that allows it to be easily spread but not too runny.

2.2 Adhesive (Optional): If you're using adhesive, apply it to the underside of the coping stone. This is especially useful for smaller coping stones or those on curved surfaces.

Step 3: Positioning

3.1 Starting Point: Begin at one end of the wall. Apply a layer of mortar onto the wall's top surface, creating a bed for the coping stones.

3.2 Placement: Carefully place the first coping stone onto the mortar bed. Press it down gently to ensure proper adhesion.

Step 4: Levelling

4.1 Level Check: Place a spirit level across the width of the coping stone to ensure it's level. Adjust the stone as needed by adding or removing mortar underneath.

Step 5: Additional stones

5.1 Spacing: Leave a small gap (about 10-15mm) between coping stones for jointing compound or mortar joints.

5.2 Repeat: Apply mortar to the top of the previous stone and the end of the next one. Place the next stone, ensuring its level and aligns with the previous one.

Step 6: Corners

6.1 Corner Stones: For corners, use coping stones with one square edge and one chamfered edge. Place the square edge against the wall, and the chamfered edge facing outwards.

Step 7: Finishing touches

7.1 Jointing: Once all coping stones are in place, use jointing compound or mortar mix to fill the gaps between stones.

7.2 Cleanup: Clean any excess mortar or jointing compound from the coping stones' surfaces while it's still wet.

Step 8: Curing

8.1 Curing Time: Allow the mortar or adhesive to cure as per the manufacturer's recommendations before subjecting the coping stones to any pressure or weather conditions.

Avoid installing coping stones in freezing temperatures or heavy rain, as this can weaken mortar bonding and curing.

What to do when coping stones become loose?

When coping stones become loose, a swift and efficient repair can be achieved through adhesive application. For a convenient alternative, a mixture of mortar and tanking slurry can also be used.

If multiple stones are loose or the wall structure is compromised, professional repair is recommended.

The repair process is uncomplicated:

  1. Clean the area thoroughly to ensure proper adhesion.
  2. Apply adhesive generously onto the coping stone's underside, pressing it firmly back into its original position. Alternatively, a bed of mortar mixed with tanking slurry can be spread onto the substrate before repositioning the stone.
  3. Allow sufficient time for the adhesive or mortar to set and cure. This straightforward procedure ensures a secure and lasting fix for loose coping stones, restoring both functionality and aesthetics.
Coping stones in garden
Reviews