Guttering plays a vital role in protecting your home from water damage. But do you know how to properly replace your gutter system? When rainwater is properly channelled away from the roof and foundations, it prevents issues such as damp walls, rotting fascia boards and a host of structural problems around the base of your property. Over time, however, guttering systems can become cracked, sagging or blocked, which reduces their ability to function effectively.
From plastic gutters to cast iron, copper, zinc and aluminium, replacing old or damaged guttering is one of the most practical maintenance tasks a homeowner can carry out to safeguard their property. While it may seem like a complicated roofing job, replacing guttering can be straightforward when approached methodically with the right tools and preparation. Understanding the process also helps you recognise when professional roofing expertise might be required.
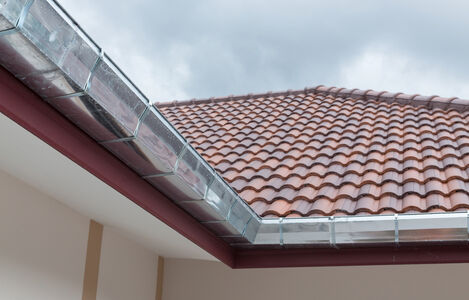
New guttering offers several benefits beyond simple water drainage. Modern materials such as our popular uPVC options are durable, low maintenance, and designed to cope with ever-changing weather conditions. Installing a new system can also improve the appearance of your roofline and even enhance overall property value.
However, failing to replace damaged guttering can lead to more serious issues. Water overflow can cause damp penetration, erosion around foundations and damage to brickwork or render. By following a clear guide and addressing problems early, homeowners can prevent costly repairs while maintaining a well protected roofing system.
In our latest blog, Roof Giant will set out everything you need to know before you replace your guttering system. From early warning signs to gathering your guttering toolkit together; planning your guttering layout to setting the correct gutter fall, and beyond. Every homeowner will be more informed with these essential guidelines, installation steps and key processes.
Before starting the replacement process, homeowners should work out if their guttering genuinely needs to be replaced rather than repaired. Minor leaks or blockages can often be sorted easily and sections can be replaced fairly quickly, but persistent faults usually indicate that the entire system has reached the end of its lifespan. Common warning signs include cracking plastic, rusting metal gutters, and joints that continually separate during heavy rainfall.
Ignoring these issues can allow rainwater to run down external walls or collect around the base of the property. Over time this can lead to damp problems inside the home and the deterioration of brickwork or mortar joints. Identifying these signs early allows homeowners to plan a full replacement before the damage worsens.
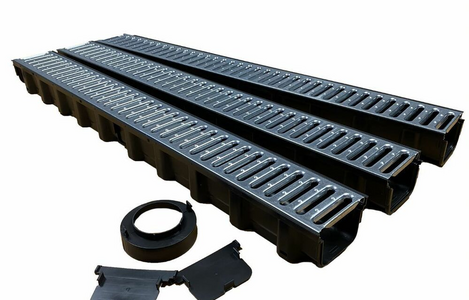
Having the correct tools and components ready before starting makes the replacement process much easier. Guttering systems are made up of several individual parts including brackets, joints, stop ends, outlets and downpipes. Preparing everything in advance ensures the installation can proceed without delays.
High quality materials are also essential for long-lasting results. Cheap or incompatible fittings can lead to leaks and poor alignment along the roofline. Investing in reliable components designed for the volatile weather conditions we experience in the UK will also improve durability and overall performance.
Accurate measurement is a crucial step when replacing guttering. The total length of the roofline determines how many gutter sections and brackets are required. Measuring carefully also helps you determine where outlets and downpipes should be positioned.
Planning the layout in advance prevents unnecessary cutting or adjustments during installation. It also ensures that rainwater is directed efficiently away from the roof and towards suitable drainage points.
Before installing new guttering, it is important to check the condition of the fascia boards that support the system. Fascias provide the fixing point for gutter brackets, so they must be strong and secure. Damaged or rotten boards can cause the entire gutter system to fail.
Older homes sometimes have timber fascias that have deteriorated due to years of moisture exposure. If the boards feel soft, cracked or unstable, they should be repaired or replaced before the new guttering is fitted.
The next step is to remove the existing guttering carefully. This process should be done gradually to avoid damaging the fascia boards or surrounding roofline. Most gutter systems are attached using screws or clip-in brackets which can be released with basic tools.
Working slowly along the roofline allows you to control each section as it is removed. This reduces the risk of gutter sections falling unexpectedly and causing injury or property damage.
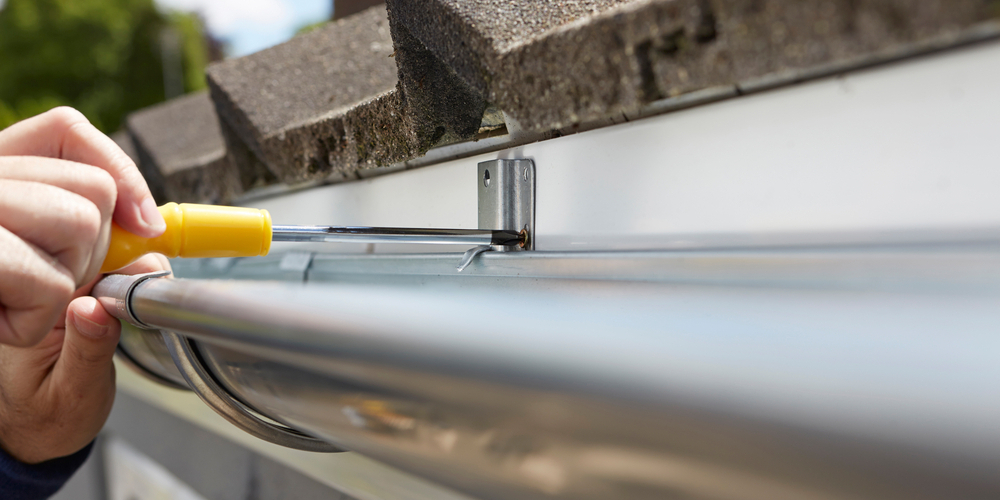
Brackets are the structural support for the entire gutter system. Correct spacing ensures the gutters remain stable even when filled with water during heavy rainfall. Poorly spaced brackets can allow gutters to sag or bend over time.
Spacing guidelines may vary depending on the manufacturer, but most systems recommend placing brackets every 800 millimetres to one metre along the fascia board. Even spacing also helps maintain a straight and professional appearance along the roofline.
For guttering to function correctly, it must be installed with a slight downward slope towards the outlet. This slope allows rainwater to flow freely along the channel and prevents standing water from collecting in the gutters.
Without the correct fall, water may pool in certain areas, leading to leaks or additional strain on the brackets. Establishing the correct gradient before fitting the gutters is therefore an essential step.
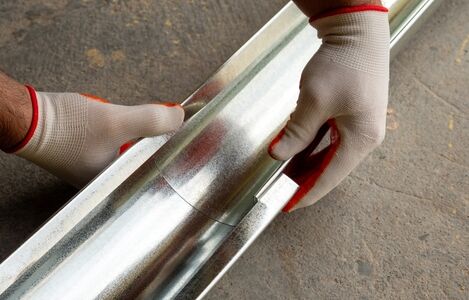
With the brackets securely installed, the gutter sections can now be fitted into place. Modern gutter systems typically use a push-fit or clip-in design that allows sections to connect quickly while maintaining watertight seals.
Working from one end to the other ensures each section aligns correctly with the previous one. Careful fitting also prevents gaps that could allow water to escape during heavy rainfall.
Downpipes carry rainwater from the gutter outlets down to ground level drainage systems. Proper installation is essential to ensure water is safely diverted away from the property. Poorly positioned downpipes can allow water to collect around the foundations.
Downpipes should be secured firmly to the wall using pipe brackets. These brackets keep the pipe stable during heavy rainfall and strong winds.
Once the guttering system is installed, it should be tested to ensure everything functions correctly. Testing allows you to identify leaks, misaligned sections or areas where water does not flow smoothly.
Carrying out this final check ensures the system performs efficiently before the job is considered complete. Small adjustments at this stage can prevent larger issues later.
Replacing guttering is only the first step in protecting your home from rainwater damage. Regular maintenance ensures the system continues to function effectively throughout the year. Debris such as leaves, moss and twigs can quickly block gutters if they are not cleaned periodically.
Routine inspection also helps identify early signs of wear or movement in the brackets. Addressing these small issues quickly prevents the need for another full replacement.
Replacing guttering is an effective way to protect your roofing system and maintain the structural integrity of your home. By following a clear step by step process and using quality materials, homeowners can install a durable gutter system that safely manages rainwater for many years. For complex rooflines or multi-storey properties, however, consulting a professional roofing specialist can ensure the installation is carried out safely and to the highest standard.