When it comes to roof health, attention usually goes to replacing cracked tiles and clearing gutters - yet the real issues often lie at the eaves. Hidden in plain sight are two silent guardians - soffits and fascias - working together to protect your property from the elements. Soffits, the horizontal panels beneath your roof edge, keep your attic ventilated and shield the rafters from moisture. Fascias, the vertical boards along your roofline, hold your guttering in place and provide a barrier against rain and pests. Without them, your home would quickly fall prey to weather damage, rot and infestations.
When maintained well, soffits and fascias not only defend your home structurally but also enhance the visual appeal of building exteriors. A clean, neat roofline creates a sharp visual finish, boosting both the value and the impression of your property. Modern materials like uPVC offer low-maintenance durability, while traditional timber provides character and charm.
But whichever you choose, keeping both in top condition is essential...
In this guide, Roof Giant will explore the most common soffit and fascia problems - from minor cracks to major decay - and explain how to fix them quickly, effectively and without breaking the bank. Whether you’re a keen DIY-er or planning to call in a professional, knowing the signs and solutions can save you time, stress and money.
Nothing makes a home look tired faster than fascias that are soft, crumbling and streaked with rot. Traditional timber, while classic, is vulnerable: when paint peels and the surface begins to soak up water, moisture quietly works its way through joints, cracks or failed coatings. Left unchecked, the wood weakens, fungus takes hold and the entire roofline loses its strength - turning a small repair into an expensive replacement.
PVC, on the other hand, completely removes this risk. Unlike timber, it doesn’t absorb water, won’t rot, and never needs repainting. Once installed, PVC fascias maintain their strength and appearance for years with little more than an occasional wipe-down, saving you both time and money in the long run.
The Fix (Step-by-Step For Timber Fascias)
If you’re still maintaining timber fascias, here’s the process you’d need to follow:
Pro Tip: Fit a drip bead along the fascia’s underside edge to help shed water away from soffits.
Prevention: Keep gutters clear twice yearly and repaint fascias at the first sign of chalking or peeling paint.
Or Skip The Hassle: Choose PVC Fascias Instead…
While repairing timber is possible, it’s labour-intensive and only ever a temporary fix. By upgrading to our PVC fascias, you eliminate the cycle of rot, repair and repainting altogether. PVC offers:
With PVC, your roofline not only looks good - it stays protected, strong and maintenance-free for decades.
If your uPVC roofline boards are rattling in the wind, splitting around fixings or bowing out of shape, they’re showing signs of stress. Constant sun exposure, thermal expansion, heavy gutters or even careless ladder knocks can all cause cracks and warping. Once gaps open up, water sneaks behind, damaging rafters, leaving your home vulnerable.
The Fix (Step-by-Step):
Pro Tip: Choose boards with built-in UV stabilisers to resist fading and brittleness.
Prevention: Keep gutters clear of debris and always use proper joint trims to reduce stress and prevent water ingress.
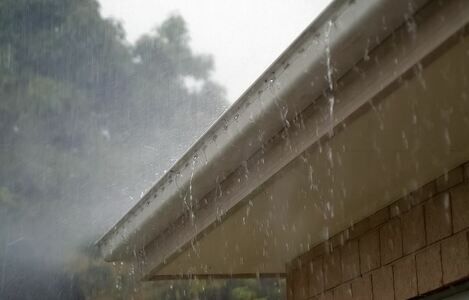
Blocked or misaligned gutters stop rainwater flowing to the downpipe, causing it to overflow and pool around your home. This can quickly lead to damp walls, stained brickwork, mould growth, and even damage to your roofline and foundations.
Left unchecked, poorly draining gutters also increase the risk of water intrusion, from cellar leaks to interior damp patches. They often attract pests such as mosquitoes breeding in stagnant water, rodents and birds nesting in debris, and insects looking for shelter. Over time, the excess moisture weakens structural elements too, with water saturating the soil around your home and putting pressure on the foundations.
The good news is that these issues are easy to avoid. With regular gutter cleaning, proper drainage checks, and basic seasonal maintenance, you can protect your roofline, prevent costly repairs, and keep your home safe from water damage.
The Fix (Step-by-Step):
Pro Tip: Clean gutters on a dry day so debris is easier to remove and water flow checks are more accurate.
Prevention: Inspect and clear your gutters at least twice a year - ideally in spring and autumn - to avoid blockages, pest issues and costly water damage.
A musty loft, black mould spots on rafters or rusty nail tips are classic signs of poor ventilation in the roofline. When soffit vents are blocked, painted over or choked with insulation, the roof simply can’t breathe. Warm air from inside the house rises, condenses on cold surfaces and feeds mould growth - gradually damaging timber and creating unhealthy air quality in your home.
The Fix (Step-by-Step):
Pro Tip: Always follow manufacturer guidance for the free vent area - good ventilation relies on balancing air intake with a clear exhaust route.
Prevention: After installing or topping up loft insulation, re-check that the eaves remain unblocked to keep airflow consistent.
If you’ve heard scratching at the eaves or noticed droppings on your soffits, you may have unwelcome visitors. Birds, rodents, and insects often sneak in through loose boards, open corners or unprotected vents. Once inside, they can damage insulation, chew wires, cause mess and even create fire hazards - turning your loft into a dangerous and unhygienic space.
The Fix (Step-by-Step):
Pro Tip: Even small 20-30mm gaps can attract birds - never leave “minor” openings unchecked.
Prevention: Carry out a roofline check each spring before nesting season to keep pests out.
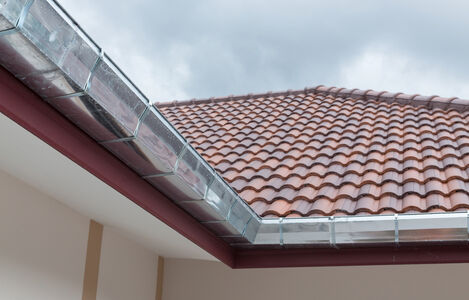
Damp staining on the wall below your eaves or rotten fascia tops usually point to missing eaves trays or drip edges. Without this small but vital component, rainwater running down roofing felt curls back behind the fascia instead of dropping cleanly into the gutter. Over time, this hidden water damage weakens boards and masonry alike.
The Fix (Step-by-Step):
Pro Tip: Adding eaves trays is a quick, inexpensive job that prevents a huge amount of hidden damage.
Prevention: Always include eaves protection when replacing fascias and soffits - it’s a long-term safeguard.
After a storm, missing or flapping soffit panels are a sure sign that wind has forced its way into poorly supported boards. Short-cut panels, sparse fixings or a lack of continuous bearers give gusts a chance to lift corners. Once the wind catches, turbulence can tear out the whole panel, leaving gaps for pests and water to enter.
The Fix (Step-by-Step):
Pro Tip: The windward side of your home takes the most punishment, so check these soffits each autumn before storm season.
Prevention: Use manufacturer-recommended fixings and spans; don’t cut corners on support.
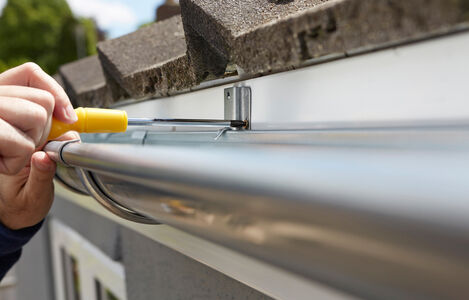
Rusty streaks running down your fascias, or fixings that spin in place when you try to tighten them, are both signs of corrosion. Using the wrong metal fasteners, or living in a coastal location where salty air accelerates rust, will weaken the fixings and stains your boards. As corrosion eats into screws and nails, fascias loosen and gutters start to sag, putting the whole roofline at risk.
The Fix (Step-by-Step):
Pro Tip: Never mix metals - galvanised nails and uPVC fascias don’t play well together and will corrode fast.
Prevention: Always specify stainless fixings for fascia and soffit projects, especially near the coast.