How to Fit VELUX Blinds

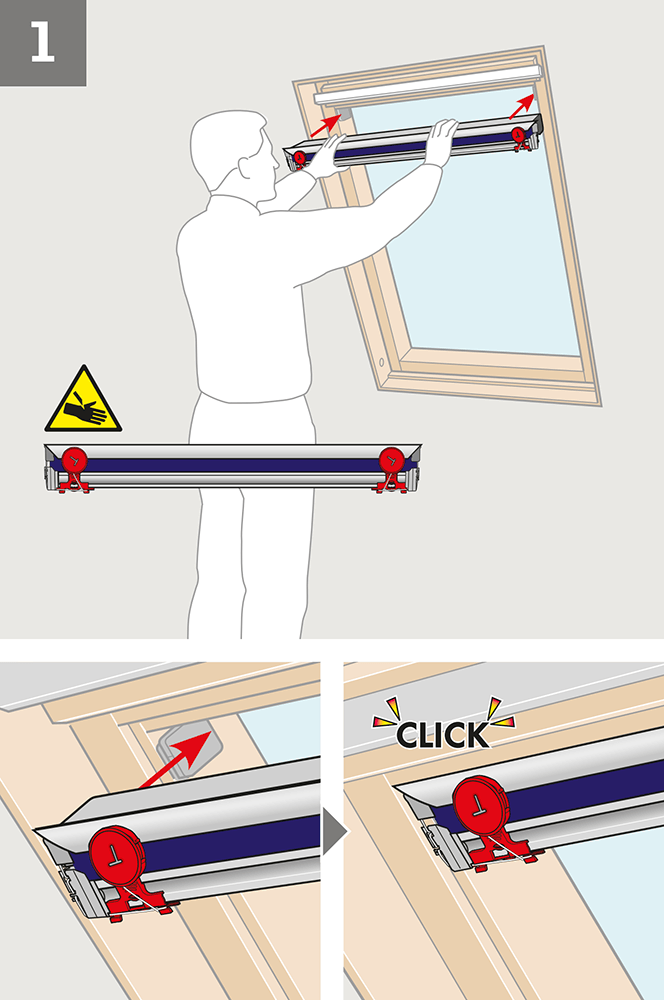
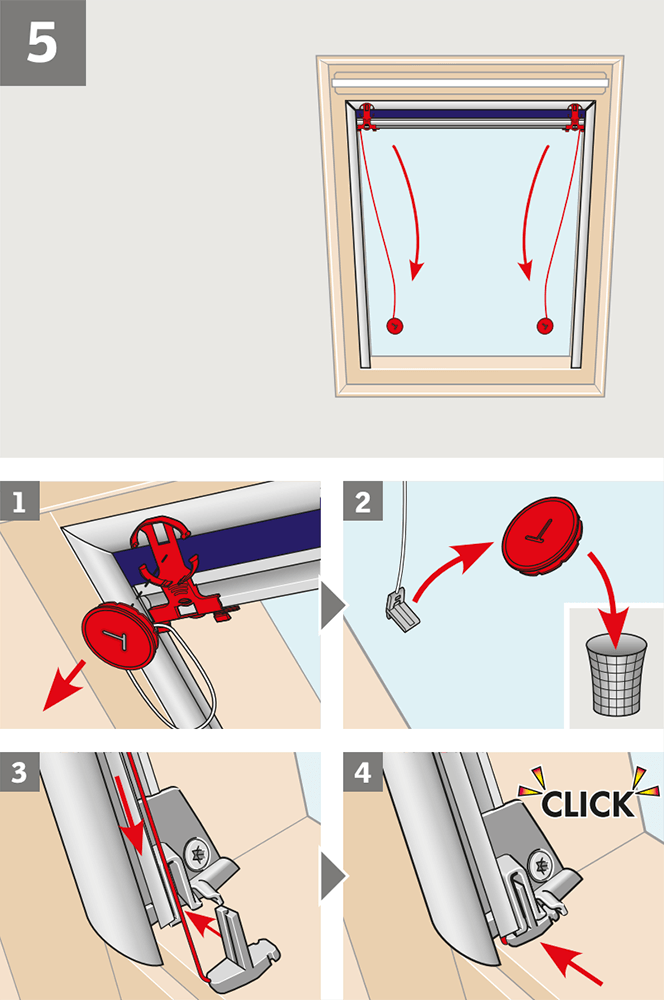
If you have purchased a VELUX blind and are looking for some extra guidance on the installation process, then this guide is for you. No cutting, trimming, measuring or special tools are required. We'll walk you through the simple process, step-by-step, with some handy reference images below to make things even easier. All it takes is clicking the top of your blind into the pre-installed brackets and mounting the side rails to finish. Everything is included in the box, so you'll be ready in no time.

Your VELUX blind is made to measure for each and every window, so there's no resizing, guesswork, or awkward adjustments. If it's the right blind for your VELUX window code, it will fit perfectly.

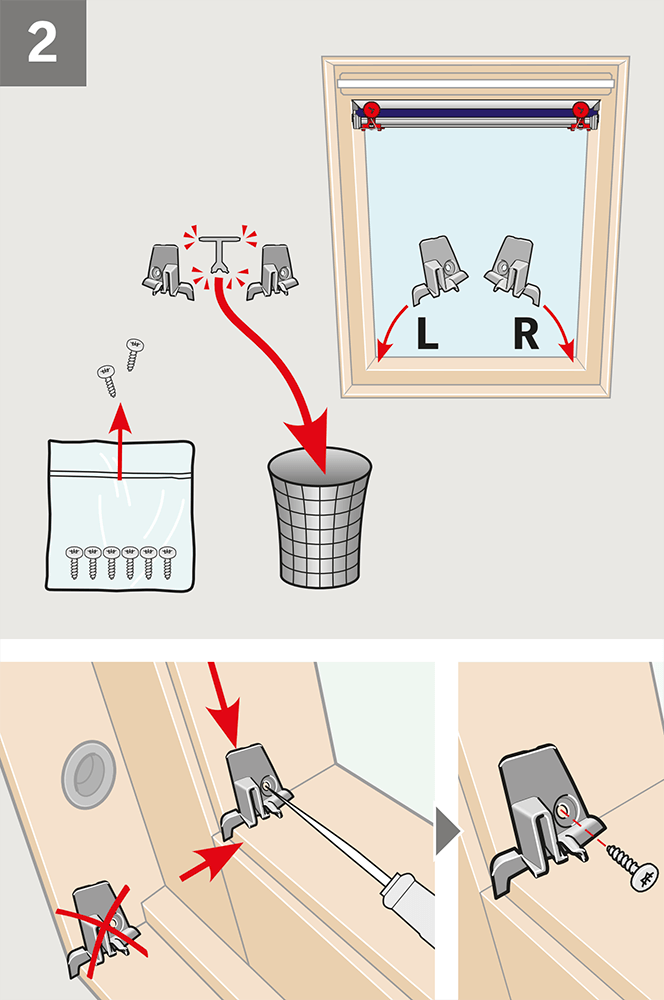
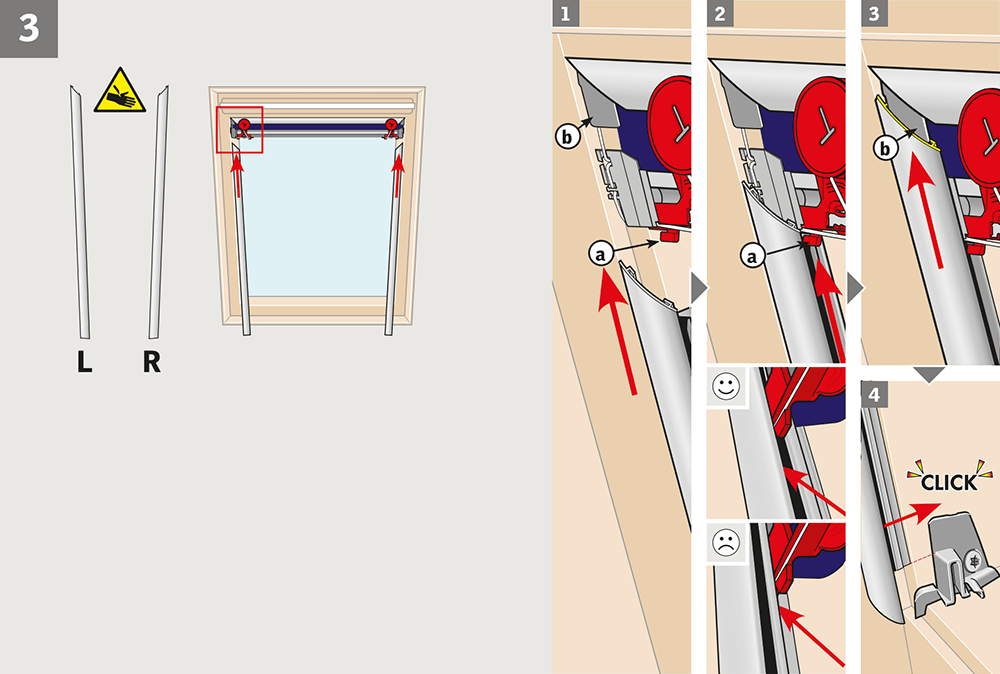
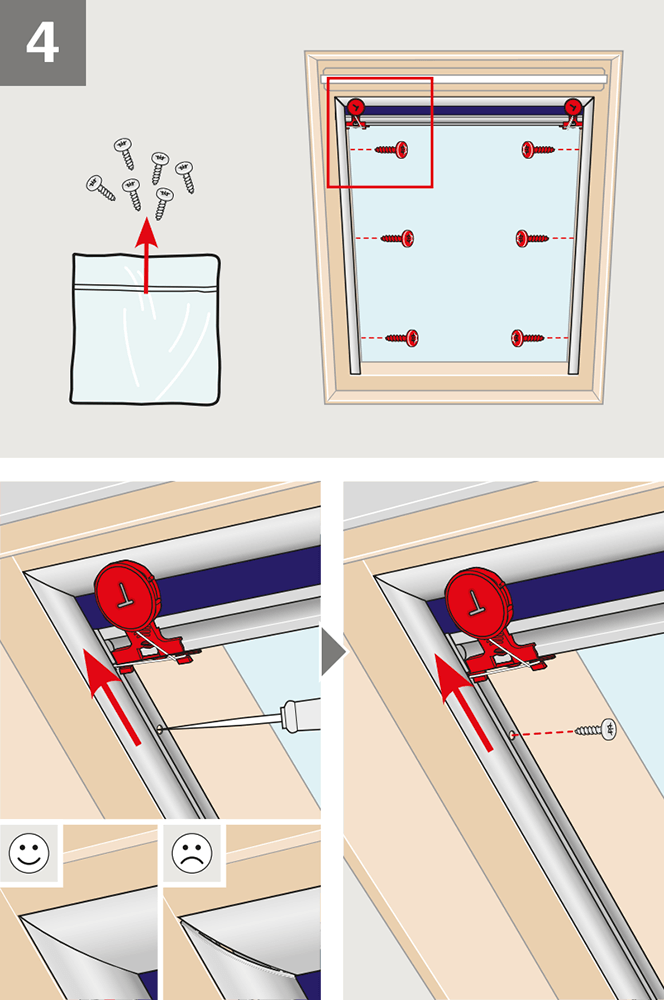
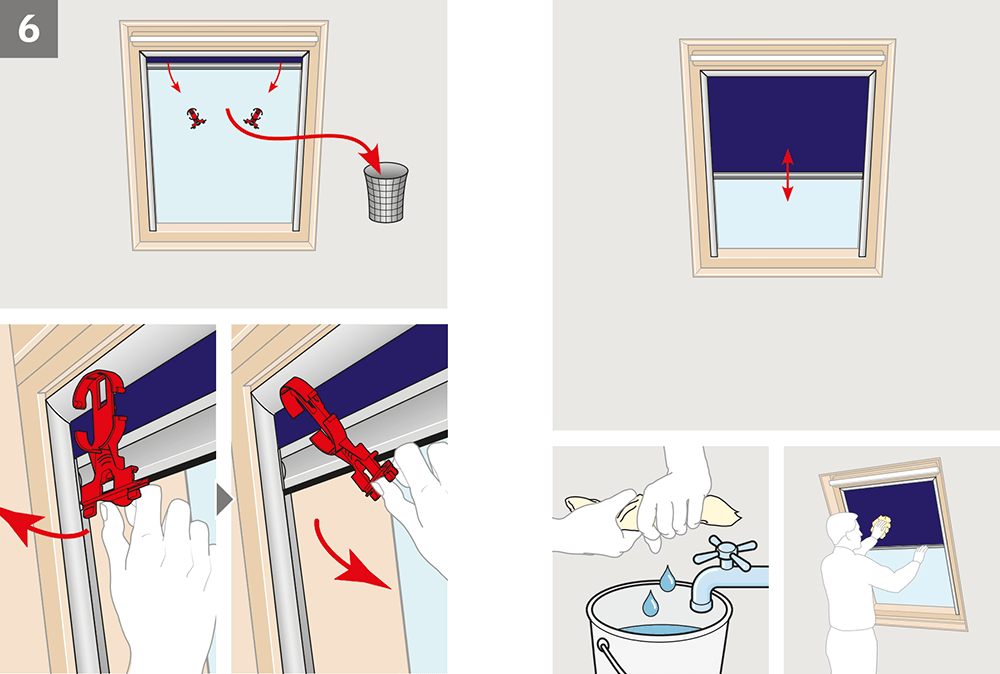
You don't need to be a DIY expert either. Many homeowners fit them straight out of the box with nothing more than a simple screwdriver. Because these blinds are designed by VELUX, they sit neatly within the frame, moving up or down with effortless operation, as though they were installed by a professional.

How to fit a VELUX manual blind

Your VELUX manual blind will come with everything you need to install your blind including two side rails, the blind and incorporated top trim, a fixing kit that includes screws and a screwdriver as well as an instruction manual. Below are the steps you can follow to correctly install your VELUX blind.

Step 1: Place the blind into the window brackets and push into place on the left and the right until you hear an audible click (See Fig. 1).

Fig 1
Fig 1

Step 2: Break off the piece of plastic which is keeping the bottom window clips together and discard that. Each clip is conveniently labelled with left and right to show which side the clips should be used on. Screw each clip into the bottom of the window frame (See Fig. 2).

Fig 2
Fig 2

Step 3: The next step is to fit the side rails. These should slide into position at the top and click into place at the bottom (See Fig. 3). Ensure that the side rail sits flush with the top part of the blind before clicking into place.

Fig 3
Fig 3

Step 4: It's now time to screw the side rails into the window frame with the remaining screws. Make sure the top part of the blind is still sitting flush before you begin. You may need to gently push the side rail up into position if there is a slight gap (See Fig. 4). Repeat this step on both sides.

Fig 4
Fig 4

Step 5: Next, unclip the plastic reel from its holder and unravel the guide string. You will need to make sure that the guide string is inside the large channel in the side rails. Remove the guide string clip from its holder and push into the bottom window clips (See Fig. 5). Repeat this step on both sides.

Fig 5
Fig 5

Step 6: Your final step is to remove the plastic clips at the top of the blind. You can do this by pulling the tab out and to the side, as shown in Fig. 6. This piece of plastic can be discarded. Now your blind is ready for use.

Fig 6
Fig 6

How to fit an electric VELUX blind

An electric VELUX blind follows the same straightforward installation process as a manual blind, but with the added step of installing the necessary electric components to the outside of the window. Each electric blind is supplied with a detailed, step-by-step instruction manual tailored to your VELUX window and blind type, taking you through the entire process from start to finish.

Reviews